Read Related Article: Best Easy Coffee Dessert Recipes for Gatherings & Entertaining
Easy coffee dessert recipes perfect for gatherings: tiramisu, mocha brownies, affogato, and make-ahead favorites your guests will ask you to make again.
Read More


Use high heat, cook ingredients in batches to avoid overcrowding, and keep ingredients moving in the pan for even cooking.
Cook sliced onions slowly over low heat with a bit of oil or butter, stirring occasionally, until deeply browned and sweet.
Use a meat thermometer to check internal temperatures: 145°F for pork, 160°F for ground meats, and 165°F for poultry.
There's a moment at every great party when the energy shifts. Maybe it's when the music lands just right, or when someone finally uncorks the good wine. But if you've ever watched a sundae bar get set up across a table, the towers of toppings, the gleaming jars of sauce, the ice cream tubs sweating gently in their beds of ice, you know that moment belongs entirely to dessert. People stop mid-conversation. Kids materialize from nowhere. Adults who swore they were "watching their sugar" suddenly have a spoon in their hand.
A DIY ice cream sundae bar is one of those rare party ideas that works for absolutely everyone. It fits a backyard birthday party or a baby shower, a casual Friday night with neighbors or a big family reunion. You don't need a catering license, a professional kitchen, or a budget that makes you wince. What you need is a table, some imagination, and a willingness to let your guests make a beautiful, delicious mess. This guide walks you through everything: how to make the ice cream (or not, no judgment), how to build the bar, and how to pull the whole thing together so you can actually enjoy the party you're throwing.
Most party desserts ask something of you, precise timing, careful plating, anxious hovering by the oven. A sundae bar asks almost nothing, and gives back enormously.
The biggest thing it gives back is engagement. Guests aren't passively receiving dessert; they're building something. That act of choosing, chocolate or caramel? Sprinkles or pretzels? One scoop or three?, creates a small, joyful ritual that gets people talking, comparing, and laughing. It's a conversation starter built right into the food.
It also handles dietary variety with almost no extra effort on your part. A couple of dairy-free ice cream options, a nut-free topping section, and a few naturally lower-sugar choices, and you've covered most of the table without a complicated separate menu. And because guests serve themselves, you're not fielding substitution requests all night.
Then there's the scalability. A sundae bar for four is just as achievable as one for forty, you simply adjust quantities and the number of flavor options. Compare that to a plated dessert, where every additional guest adds time, dishes, and stress. The sundae bar grows with your guest list without growing your anxiety.
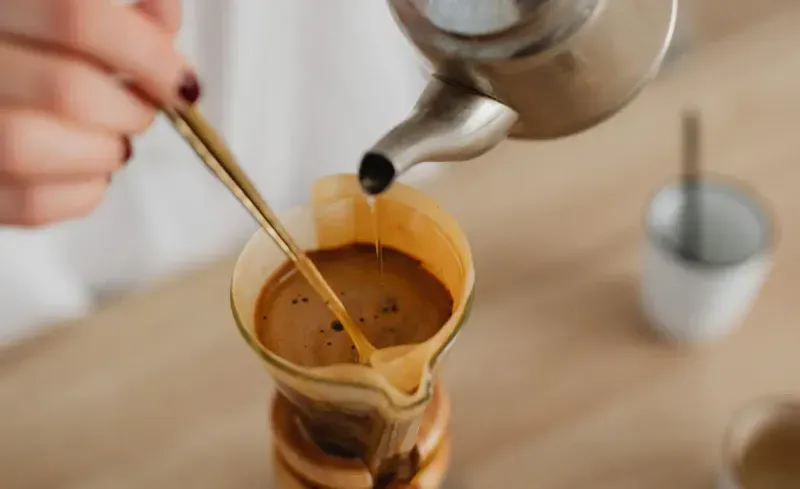
Easy coffee dessert recipes perfect for gatherings: tiramisu, mocha brownies, affogato, and make-ahead favorites your guests will ask you to make again.
Read MoreHere's where you get to make the first real decision: are you making the ice cream yourself, buying it, or doing a smart combination of both? If you're going the homemade route, and we genuinely recommend it, because fresh ice cream at a party is a moment unto itself, here's a breakdown of what you're working with.
The most common entry point into home ice cream making, these machines use a canister that you freeze overnight (or for at least 12 to 24 hours) before churning. Once frozen, you pour in your chilled ice cream base, attach the lid, and the built-in paddle does the work in about 20 to 30 minutes.
They're affordable, compact, and available at almost every kitchen store. The tradeoff is planning ahead, that bowl needs a full day in the freezer, and you can only make one batch before you'd need to refreeze. For a host who entertains a few times a year and wants to make one or two flavors the day before a party, a freezer bowl machine is a perfectly capable and budget-friendly choice.
Think of these as the upgrade. Compressor machines have their own built-in cooling unit, which means no pre-freezing, no waiting, no second canister. You pour in your base and churn back-to-back batches as many times as you want on the same afternoon.
The results are also more consistent, temperature is better controlled, so the texture tends to be smoother and more scoopable. The downsides are real, though: compressor machines are significantly more expensive and take up considerably more counter space. But if a sundae bar is going to become a recurring part of how you host, summer gatherings, holiday parties, birthday traditions, the investment pays for itself quickly in both quality and convenience.
These are the ones your grandparents might have used. Rock salt lowers the freezing point of the ice surrounding the canister, and you churn by hand (or with a motor attachment, depending on the model) until the mixture thickens into ice cream.
They're labor-intensive and require a steady supply of ice and rock salt. But they make genuinely large batches, they work beautifully outdoors, and the act of churning becomes part of the party itself, especially if you put the kids in charge of the cranking. For a 4th of July cookout, a summer block party, or a family camp weekend, an old-fashioned ice cream maker brings an energy that no countertop appliance can replicate.
No machine? No problem. The no-churn method is exactly what it sounds like: whipped heavy cream folded into sweetened condensed milk, flavored however you like, poured into a loaf pan, and frozen overnight. No churning required. No special equipment. Just a hand mixer or a stand mixer, a freezer, and a few hours of patience.
The texture is a bit denser and icier than churned ice cream, it's not quite the same thing, but the flavor can be absolutely delicious, and the customization potential is enormous. Swirl in peanut butter, stir in crushed cookies, layer in fruit compote. It's a forgiving, beginner-friendly method and genuinely good for last-minute entertaining when you didn't plan for a machine.
Let's be clear: there is no shame whatsoever in buying ice cream. In fact, the smartest approach for most sundae bars is a hybrid one, make one or two homemade flavors for the "wow" factor, and fill in the rest with good-quality store-bought options. Aim for three to four flavors total. That's enough variety to give guests real choices without overwhelming the bar or your freezer.

From backyard BBQs to wedding receptions, these glass drink dispensers keep beverages flowing. Top picks compared by size, spigot quality, and tabletop appeal.
Read MoreThe general rule of thumb is about two to three scoops per person, which works out to roughly half a cup of ice cream per guest. For a gathering of twenty people, plan on about two and a half quarts of total ice cream, then round up, you'd rather run out of sprinkles than ice cream.
A few practical tips for keeping things scoopable. Chill your serving bowls in the freezer before the party so ice cream doesn't melt on contact. Invest in a good ice cream scoop, a spring-loaded one with a comfortable handle will save your wrist over the course of the evening. And pull your ice cream containers out of the freezer about five to ten minutes before serving so they're soft enough to scoop cleanly.
For serving logistics: keeping ice cream in its original container (nestled in a larger bowl of ice) tends to work better than transferring it to a single decorative bowl, which can get unwieldy and melts faster with less surface-area insulation.
Think of your sundae bar in three distinct layers. When you build them intentionally, the result is a spread that looks abundant, makes sense to navigate, and covers every kind of craving.
This is your ice cream lineup. Anchor the selection with the classics, vanilla, chocolate, and strawberry cover the widest range of preferences and pair well with almost every topping. Then add a wildcard fourth flavor: something seasonal, unexpected, or homemade. Brown butter pecan, salted honey, lavender, mint chip, this is where your personality as a host shows up. Include at least one non-dairy option (coconut milk and oat milk bases have both come a long way) so no guest feels left out.
Hot fudge and caramel are non-negotiable. Beyond those, strawberry sauce and butterscotch round out a classic spread. The challenge at a party is keeping warm sauces warm without constant attention, a small slow cooker on the lowest setting works beautifully, as does a fondue pot. Label each sauce clearly, and have a few small ladles or pourers available so guests aren't reaching across each other with sticky spoons.
This is where the bar gets truly personal. For a classic spread: rainbow sprinkles, crushed Oreos, chopped walnuts or peanuts, maraschino cherries, and mini M&Ms. For a more elevated take, consider adding toasted coconut, salted pretzels, fresh berries, brownie bites cut into cubes, or, for adventurous adult gatherings, candied bacon. Finish with whipped cream: canned is perfectly fine for ease and kid-friendliness, but freshly whipped cream served in a chilled bowl elevates the whole presentation.
How you arrange the bar matters almost as much as what's on it. A long table works well for linear flow, guests move down the line, building their sundae as they go. A tiered stand or a mix of heights (cake stands, wooden boards, stacked books under tablecloths) adds visual interest and makes everything easier to reach.
Label absolutely everything. Not just for aesthetics, for allergies. A small chalkboard sign or even printed card tents identifying each flavor, sauce, and topping takes about ten minutes to prepare and signals real thoughtfulness to your guests.
For serving vessels, you have options: classic bowls are always right, waffle cones add a fun texture contrast, and mason jars give a rustic, photo-ready look that guests tend to appreciate. Keep a stack of each and let guests choose.
One underrated trick: create one or two "signature sundae" suggestion cards, a handwritten card that says something like "The Classic: vanilla + hot fudge + crushed Oreos + whipped cream + cherry" or "The Tropical: mango sorbet + toasted coconut + pineapple + caramel." Some guests genuinely love having a starting point rather than staring at fifteen options trying to begin.
.webp)
The real guide to summer party drinks: easy pitcher recipes, mocktails, and batch cocktails built for hot days, big crowds, and stress-free entertaining.
Read MoreThe great advantage of a sundae bar is that almost everything can be done before your guests arrive.
One to two days before: Make your homemade ice cream batches and get them into the freezer. Prepare your sauces, hot fudge and caramel both keep beautifully in the refrigerator for several days and reheat easily. Prep any toppings that require advance work (toasting coconut, making brownie bites, candying bacon).
The day of: Set up the physical bar, arrange your tables, gather your serving vessels, pull out your scoops and ladles. Prep toppings that are best fresh: chop any fruit, arrange toppings in bowls or ramekins, fill your whipped cream dispenser if you're doing it fresh.
Thirty minutes before guests arrive: Arrange the full spread, label everything, taste-test your sauces so you can adjust sweetness or warmth. Nestle your ice cream containers in ice. Light a candle nearby if you want the full effect.
During the party: Check in every so often to replenish toppings, stir the sauces, and refill the whipped cream. That's it. The bar mostly runs itself.
Once you've got the basics down, themes are an easy way to make the bar feel custom to any occasion.
Tropical Bar: Mango sorbet and coconut ice cream, topped with toasted coconut flakes, fresh pineapple chunks, macadamia nuts, and a drizzle of caramel. Ideal for summer parties or backyard luaus.
S'mores Bar: Rich chocolate ice cream with marshmallow fluff, graham cracker crumble, hot fudge, and a kitchen torch nearby for anyone who wants to toast their marshmallow topping tableside. Wildly popular with kids and adults alike.
Birthday Cake Bar: Cake batter ice cream (homemade or store-bought) topped with rainbow sprinkles, a drizzle of vanilla frosting, and birthday candle picks for the birthday guest's bowl. Festive without being complicated.
Grown-Up Bar: Salted caramel ice cream, espresso sauce, dark chocolate shavings, candied pecans, and boozy cherries soaked in bourbon or amaretto. Best reserved for the after-the-kids-are-in-bed portion of the evening.
Here's the thing about a sundae bar: it doesn't require a perfect host. It doesn't require a perfectly timed reveal or a flawlessly decorated cake or a dessert that photographs well from one specific angle. It requires a table, a handful of flavors, a spread of toppings, and people who are glad to be together.
The guests who debate hot fudge versus caramel with complete earnestness. The kid who stacks her brownie bites so high they slide off. The dad who goes back for a second bowl and pretends it's for "quality control." These are the moments that make a gathering feel like more than just a party.
Pick your ice cream method, machine, no-churn, store-bought, or some mix of all three. Line up your toppings. Warm your sauces. And then step back, because once the sundae bar is open, the party takes care of itself.
Homemade ice cream is best made one to two days ahead. Beyond three days, the texture can become icier and harder to scoop as ice crystals develop. Store it in a sealed, airtight container with a layer of plastic wrap pressed directly against the surface to minimize ice crystal formation.
A freezer bowl machine is the easiest and most affordable entry point. Brands like Cuisinart offer reliable models under $100 that produce excellent results. Just remember: the bowl needs to be fully frozen before you churn, so plan at least 24 hours ahead.
Keep your containers in the largest bowl or container you have, packed tightly with ice. Pull individual containers out one at a time rather than setting them all out at once. If it's a very hot day, consider serving in rounds, one flavor at a time, so the rest stays cold longer.
.webp)

